How to validate your cells in Excel for Dates and Understanding Format Styles
Dec 21, 2022
Data Validation in Excel
Data Entry errors have cost organizations billions of dollars; Excel data entry errors contributed to the $6 billion trading loss by JP Morgan in 2012, the infamous London Whale Debacle, studies show that almost 9 out of 10 spreadsheets have errors, and most of these errors are human entry errors and here is where spending a little more time implementing data validation steps is invaluable.
For this article, I will focus on a very common type of data entry, Dates. The most popular data entry sequence for dates is Day, Month, Year, however, this is not the case for countries like the United States, where dates are entered in the Month, Day, Year format. Now most software show you a calendar, you select the date you want and move on. But in Excel, you most often need to type the date manually into a cell and this can cause some unexpected accuracy and consistency issues.
Imagine this scenario, you are working with a diverse team and you share your reports with your colleague in the United States. To access the report you require users to enter the required report date into a cell. Let's assume the required report date is the fifth of December 2014. Your colleague in the United States enters 12/05/2014 into the cell, It is very possible that the system may recognize this entry as the twelfth day of May 2014 instead of the intended fifth of December 2014. This simple error can cause major discrepancies or inaccuracies in reporting and decision-making.
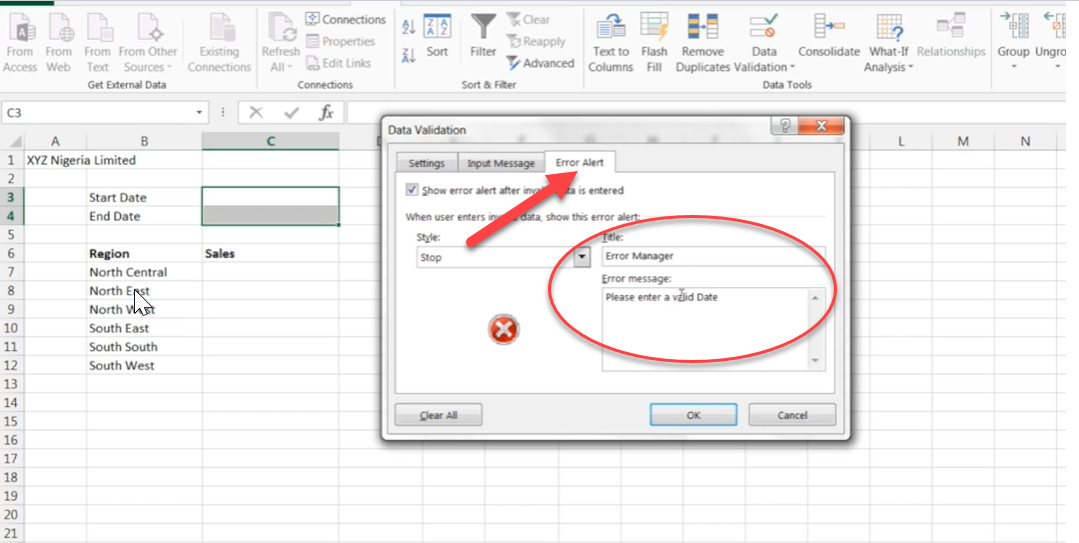
The simple solution to this is to validate the data entry cell to only accept valid date entries. When you correctly validate your cells, erroneous data entries are rejected and you can even program a user message to pop up to guide a user on the correct date format to enter like in the image below.

In this blog post, we will show you how to validate your cells to accept valid date entries and we will also review how to utilize Excel format styles to standardize the way dates are visualized in your reports.
How to Validate Dates in Excel.
The following steps will show you how to validate your cells to accept accurate date entries.
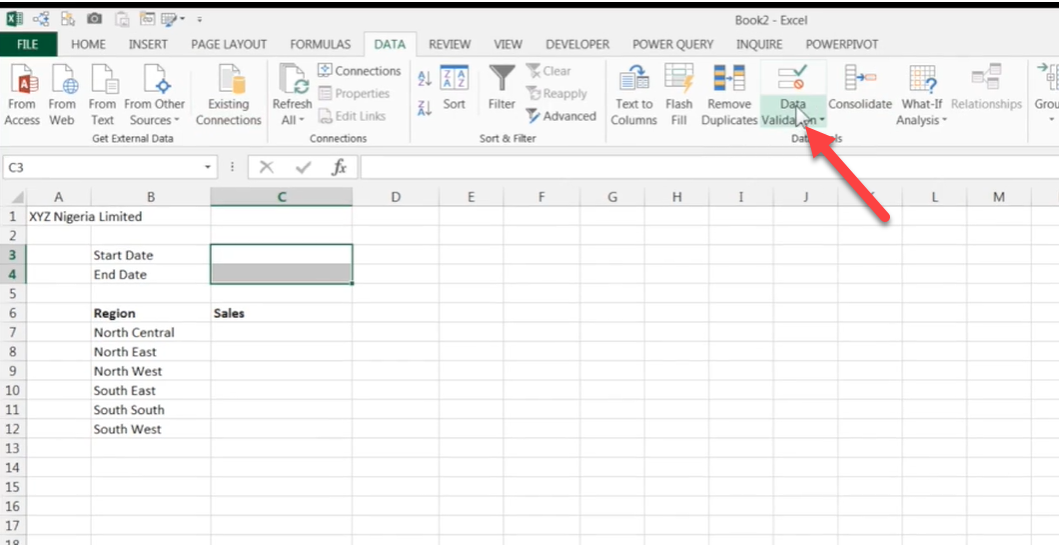
Step 1: Highlight the cells you want to validate for Date
Step 2: Click on Data on the Menu Bar and select Data Validation
Step 3: In the pop-up that appears you’d find the options for Settings, Input Message and Error Alert
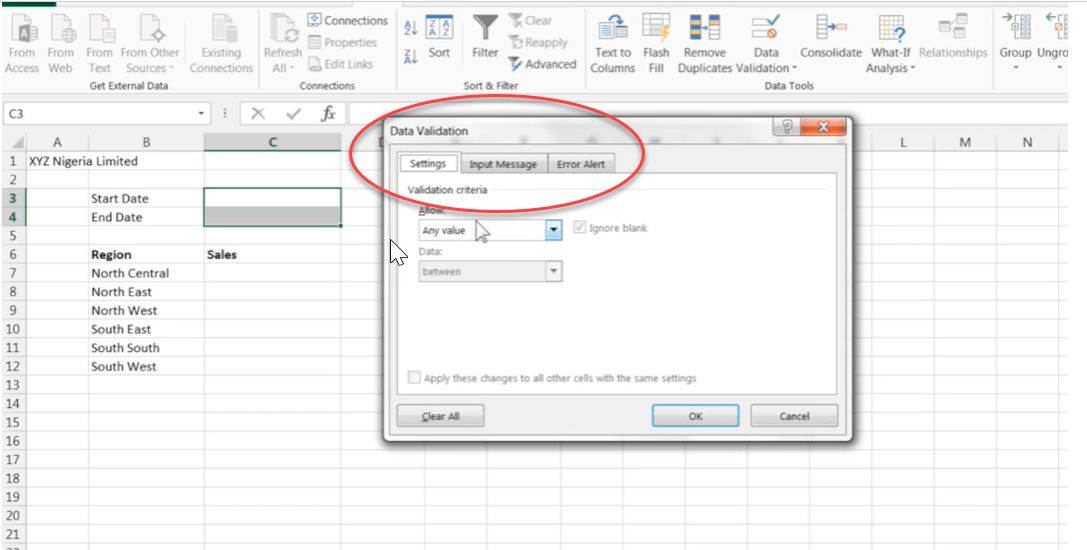
Step 4: Click on Settings
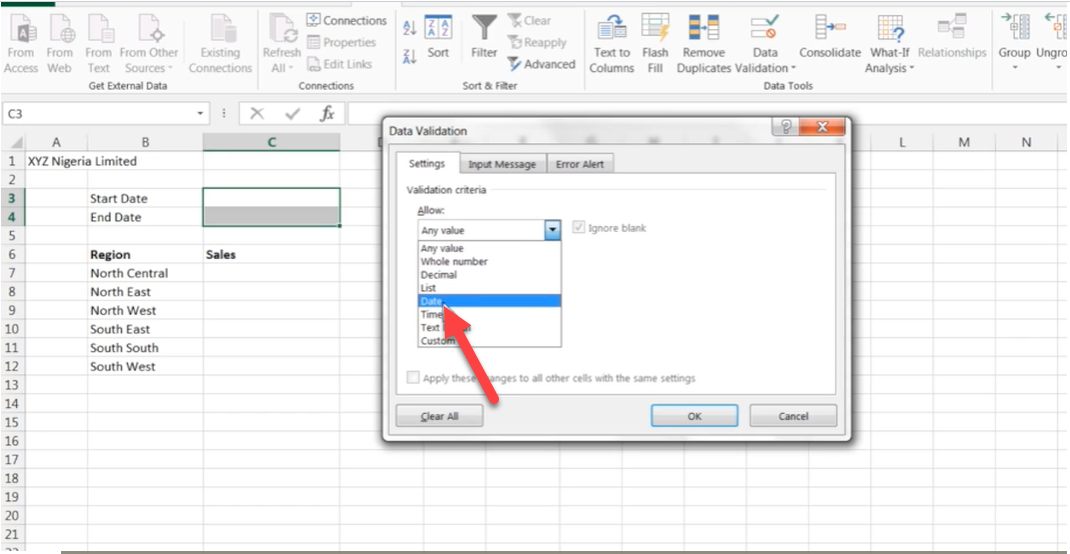
Step 5: In the “Allow” tab drop down select Date
Step 6: In the “Data” tab drop-down select Greater than
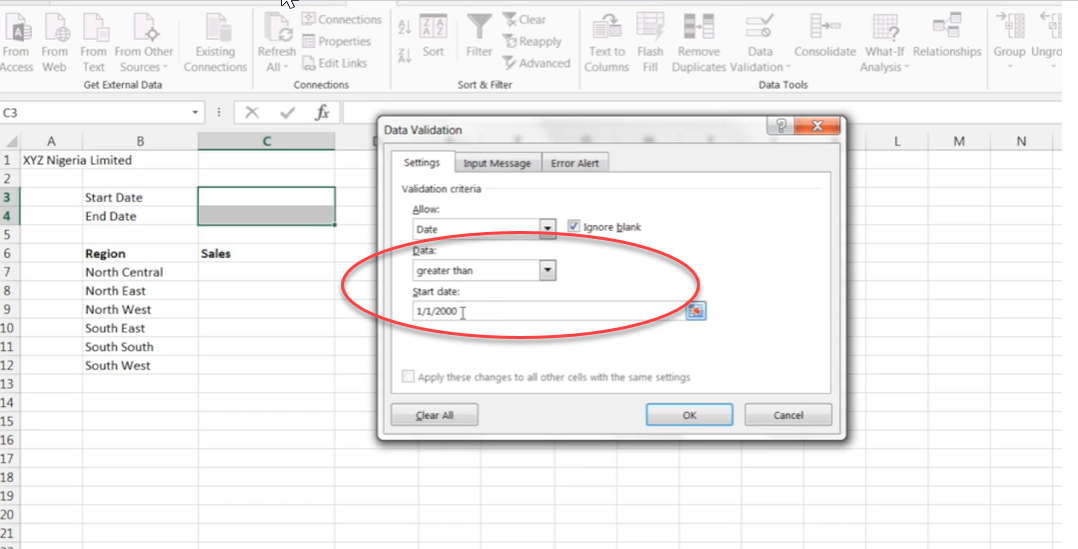
Step 7: Enter your preferred start and end date
Step 8: Select Ok
You have now data validated the selected cells to allow the input of only valid dates. You can also validate the cell to show an error message when a user inputs a wrong date. Follow steps 1-3 and click on “Error Alert” to do this.
A Special Note on Data Entry vs Data Format in Excel
Excel's Data Validation tool controls what you actually enter into a cell, a format applied to a cell on the other hand only affects what you see. In our training courses at dbrownconsulting, we have coined this little rhyme that is worth repeating here.
"A format can never change what is in a cell, it only changes what you see, and what you see is not necessarily what is in a cell."
I can type 1234765 into a cell and use Formating to make it look like 1.23m or 1,234,765 or 0.123 billion all of these are formats. Excel has a very powerful formatting engine that follows very precise rules, watch this video to learn more about it.
Confused? Well, remember our Rhyme above. Let me add a small twist though, Excel treats Date Entries somewhat differently. When you enter a valid date into a cell in Excel, Excel does a special conversion in the background, it converts that date into a number. For example type 1/1/2001 into a cell, then format that cell as a number, you will see that Excel changes the value of that cell to 36,892. What Excel is doing is that it starts counting dates from the 1st of January 1900 so 1/1/2001 is 36,892 days after 1/1/1900.
[Watch this video to learn more about this]
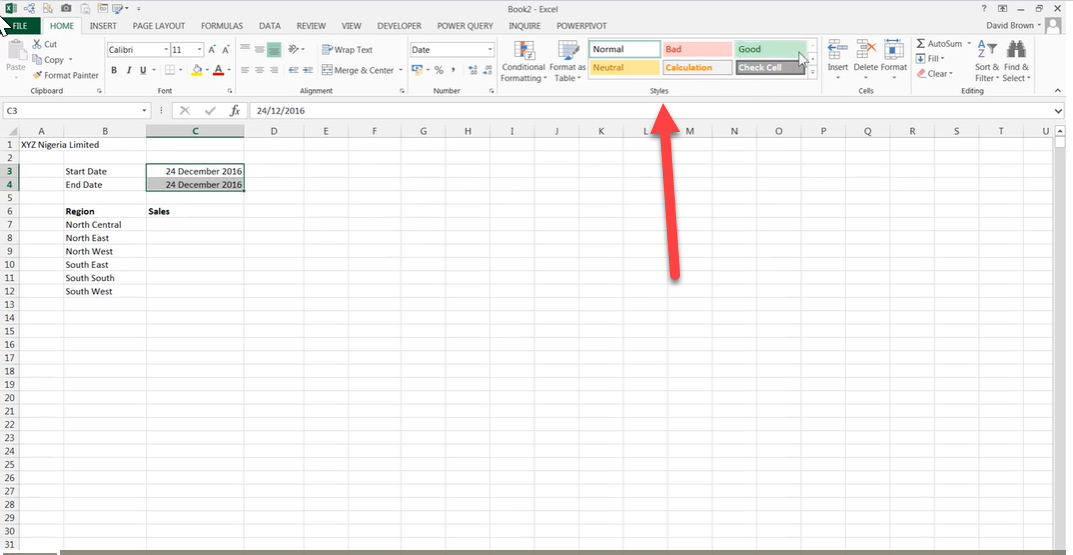
I have a big ask of you whenever you need to format dates; please always use a format that shows the name of the month e.g. 10-Dec-2022 or Dec-10-2022 or 10-December-2022 and not 10/12/2022 or 12/10/2022, this just makes things easier for everyone regardless of where in the world they come from.
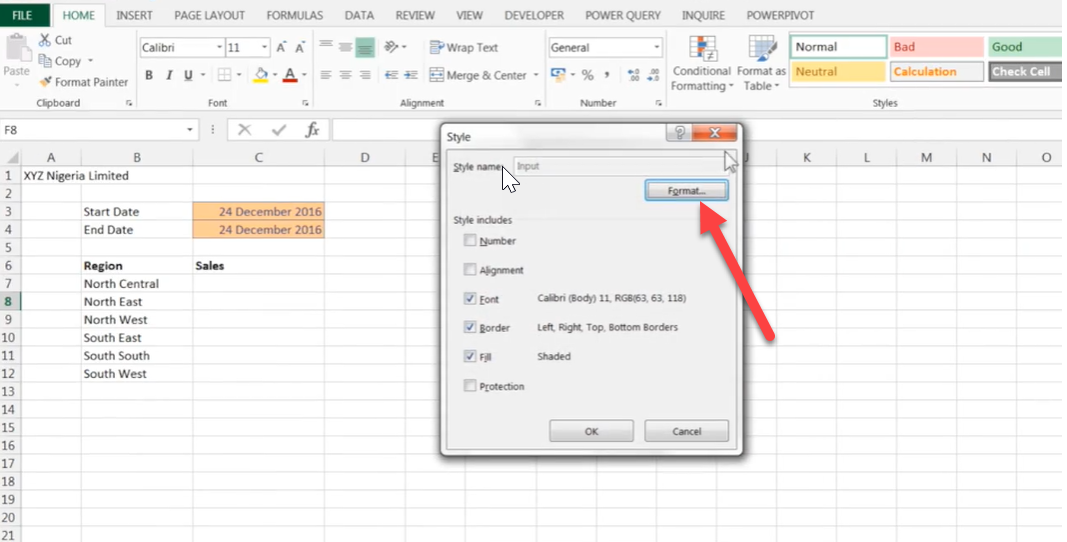
How to choose a format style in Excel
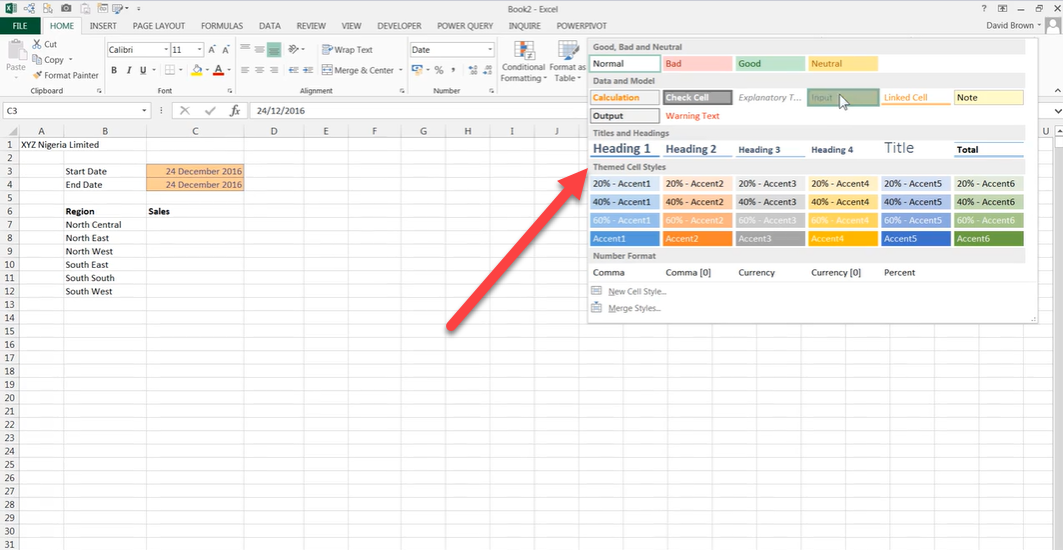
Step 1: Highlight the cells you want to validate for format style
Step 2: Go the Home on the Menu Bar and click on styles
Step 3: Select the style format you’d like. In the image below we selected input.

Step 4: Click ok
All selected cells will now carry that format style.
How to modify the formatted cells or change color:
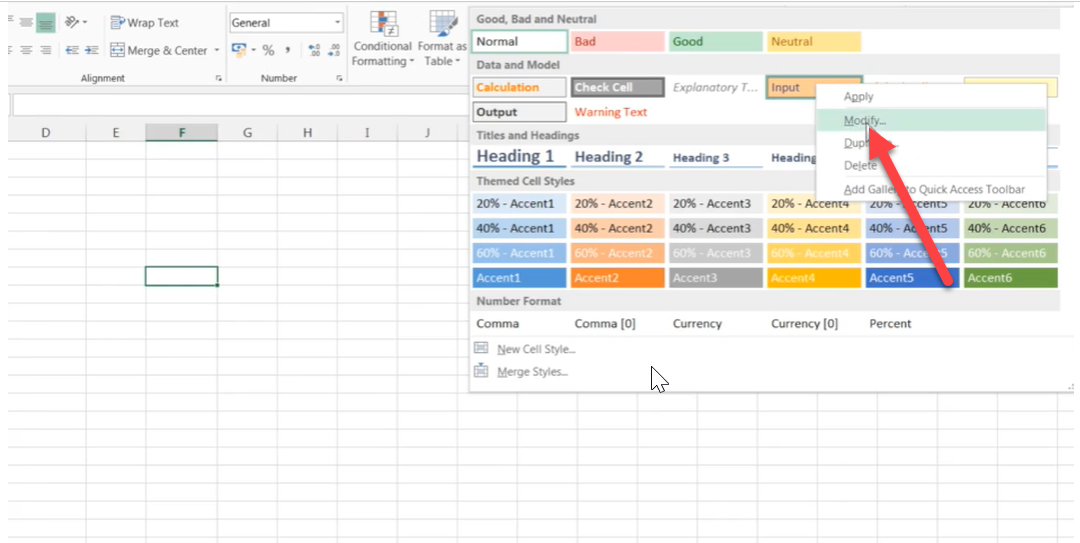
Step 1: Highlight one of the cells with the format style
Step 2: Click on the style format you chose
Step 3: Right-click and select “Modify”
Step 4: Click on format
Step 5: Click on Fill and select your new preferred color.

Step 6: Click on ok to effect your selected modification.
All the cells with that format style will immediately change to the new modified style.
There is a lot more you can do with Data Validation in Excel and we recommend you read this blog post 3 must have’s when automating reports in excel for a larger scope on why it’s important to do these small validations as they lead up to the big picture in reporting and makes automation easier.
